Student Directions:
You will transform that Night Zookeeper story that you wrote into a digital story! You will be the director and narrator, and will use the iPads to bring your story and magical zoo creature to life! Your digital story will be uploaded onto Mrs. Gately's website into our class "Night Zoo".
Step 1: Take 15 minutes to explore the "Puppet Pals HD" app on an iPad. Look at what you can do with this app, how you can move characters, zoom in and out on characters and change backgrounds.
Step 2: Use the storyboard worksheet (click on file below) and a copy of your written story to make a list of what you will need to create your story on the iPad. Include characters, props, backgrounds, etc. If you need additional drawings for your story, you may work on them now.
Step 3: Use your written story to lay out each of the scenes. In the boxes on the worksheet, sketch the characters that will be in each scene, props you need and write the background that you will use below the box. Also include in the boxes any noise effects or key words you are using for the scene. Lastly, determine if you will need help when recording your story (for example: help moving characters, changing backgrounds, noise effects, recording, etc.)
Step 4: Work with a partner to read your story. You will need colored pencils for this step. As you are reading:
* Decide which words or parts of words you will emphasize in your narration. Underline them in BLUE or PURPLE.
* Decide if you want to add any noise or spoken sound and write it in GREEN.
* Mark in a RED circle places in the story you will pause the recording to change scenes or characters.
Step 5: Create your digital story.
- Open the "Puppet Pals HD" app on an iPad.
- Click on Start.
- Click on Add Actor from photo.
- Follow directions on screen to take picture of your creature and trace the outline to make it into a digital puppet.
- Continue that process for each drawing you have made for characters or props.
- Be sure to select each one you will use for the story so there is a GREEN checkmark by each one. (You can use up to 8 characters.)
- Click on the "Next" arrow in the upper right hand corner of the screen.
- Choose your backgrounds by selecting each one you would like to use so there is a GREEN checkmark by each one. (You can choose up to 5 backgrounds.)
- Click on the "Next" arrow in the upper right hand corner of the screen.
- Practice narrating your story with moving the characters and changing the backgrounds. Practice stopping and starting the recording while narrating. If help is needed, assign your helpers their roles and practice.
- Use the RED circle record button to start your recording. Click on the double YELLOW lines to pause the recording.
- When you are finished recording, press the WHITE square and use the GREEN triangle to play back your story.
- SAVE your story by pressing the FILE button (small black & white square with arrow pointing down).
- Watch your story again and decide if any improvements or adjustments need to be made.
- Re-record story if needed and SAVE it!
Storyboard Worksheet:
| storyboard_worksheet.docx |
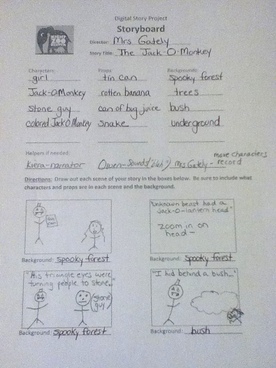
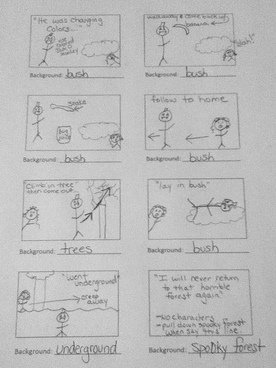
Example of Digital Story: The Jack O Monkey
This story was written and illustrated by third grader Mina S. She created this magical animal as part of the Night Zookeeper project. The digital story was created using the "Puppet Pals HD" app on an iPad and is narrated by sixth grader Kiera G.
This story was written and illustrated by third grader Mina S. She created this magical animal as part of the Night Zookeeper project. The digital story was created using the "Puppet Pals HD" app on an iPad and is narrated by sixth grader Kiera G.
Storyboard Worksheet Example: The Jack O Monkey
|
|
Lesson Plan:
| creating_a_digital_story_lesson_plan.docx |
Resources Used:
Original story & illustration used to create digital story sample:
Super, M. (2013). The Jack O Monkey.
Original story & illustration used to create digital story sample:
Super, M. (2013). The Jack O Monkey.
